Skip To...
The Whisper mission, as you most likely know, is the way to get the Whisper of the Worm Sniper Rifle in Destiny 2. However, when Into the Light released in April, Whisper of the Worm came back along with The Whisper mission, but some changes have been made to it. With these changes, you’ll find that completing the exotic missions isn’t quite like it used to be, but we’re here to walk you through the process. Let’s take a look at how to complete The Whisper mission in Destiny 2 and get your hands on a red border Whisper of the Worm Sniper Rifle.
Table of contents
How To Start The Whisper Mission in Destiny 2

Before you get started with The Whisper, you’ll need to head over to the Moon to speak with Eris Morn. She’ll give you the quest that allows you access to The Whisper. Once you have the quest and you can get started, head back to your Destinations tab and enter the Into the Light node. From there, you can select The Whisper mission and begin.
Investigate the Taken Anomaly

As soon as you enter the mission, if you search up and to the left, you’ll find a glowing Vex cube. Shooting this cube will pull up a platform that will allow you to bypass quite a bit of exploring and take you right up to the next area. After the platform appears, walk to the end of it, then jump up to the platform on the left above it and continue on.

At the top of the platform, you’ll find an enemy to take out quickly, and behind it, a Taken Blight that needs to be destroyed. Ensure that you are within the outer bubble of the Blight, then shoot at the center until it disappears. From there, just down into the hole beneath it.
Traverse Deeper Into the Anomaly

Now, it’s time to get your platforming on. Seriously, prepare for loads of jumping, and probably some missed jumps along the way.
We’re going to start out when you reach the point that Xol, Will of the Thousands tells you that you are alone. Creepy, right? The first platform you’ll need to hit is down and to your right. It’s lit up fairly well by red light, so it’s hard to miss.
From there, follow the ledge all the way over to the corner where you will need to crouch down to make it to the next area. At this point, moving sections of the platform will jut out and try to knock you off, so be careful and time your movements accordingly.

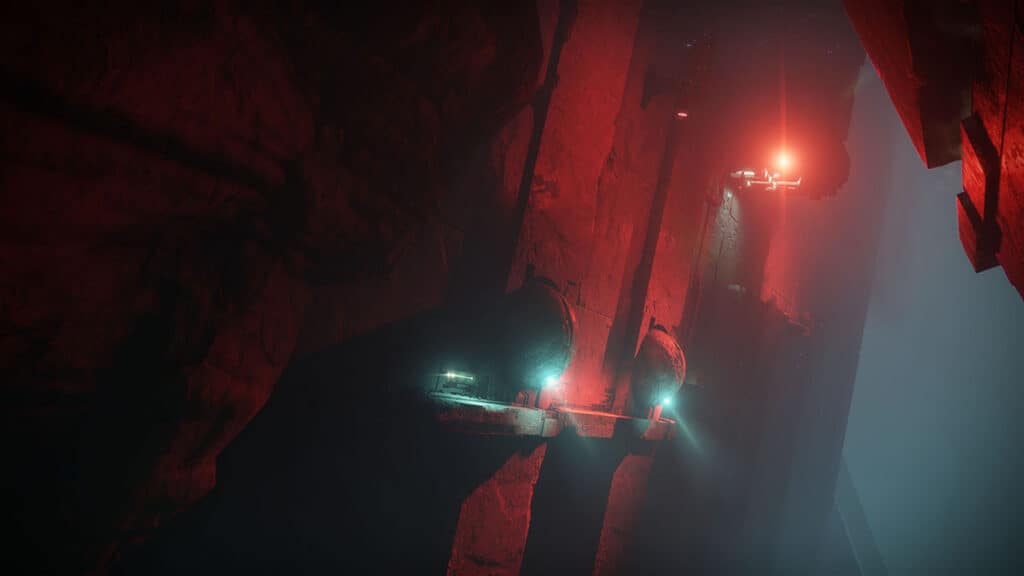
When you reach the end of the first ledge with moving platforms, you’ll need to make it to the edge, then jump down, avoiding some more moving platforms. Keep following along the various ledges until you come across the platform shown above that looks out over the chasm below you and hop over to it. You’ll need to cross some serious distance to make it to the other side, but there’s a smaller platform you can hit off to the left before you make it to your destination, the ledge lit up by blue lights directly across from you.

Your next step is to keep hopping across until you make it over to the structures that resemble large, glowing eyes facing down. Hop past them to the elevator platform and prepare to jump long distances for the next area. You’ll find ledges that have Taken Blasts on each of them. Jump past them with precision timing until you make it to the room with a bunch of portal-like openings on each side of it. Here, you’ll need to jump through the opening all the way on the top of the back right side.
The next room is where things start to get a bit confusing. You can take the long way around, or you can take the conveniently places shortcut that’s just inside the entrance. As soon as you make it inside, you can crouch and head into some of the busted stone to your right and into a crack between the rocks. Inside, you’ll find an opening in the wall that will take you to the next area.
Eradicate the Corruption

As you head into the next area, the real fighting will begin and things will get a bit more difficult. Be aware of snipers lining the walls and loads of Taken enemies to slay. Be sure to take out any Taken Blights and be aware of Blasts coming from the walls that will knock you out of place and deal some pretty good damage. Once you’ve cleared the area, shoot the Taken Barrier to head into the next room to take on some more enemies.
Defeating the Taken Bosses and Completing The Whisper

In the final room, there will be three bosses for you to take down. Each one can be spawned by shooting their Vex Cubes. It’s recommended that you only fight one at a time, but if you’re into getting triumphs, you can spawn them all together. Once you’ve lowered the health of all three bosses, Tulgorh, Aspect of Agony, will spawn.
To defeat Tulgorh, you’ll need to take out the Wizards flying around, which will then lower his shields and make him vulnerable to attacks. Every time his shields go back up, you’ll need to kill more Wizards and, finally, defeat Tulgorh. Once he’s down, you will have completed the mission and gotten a chest containing the blueprint for Whisper of the Worm to craft it for yourself.
Destiny 2 is now available on PC,


