
Skip To...
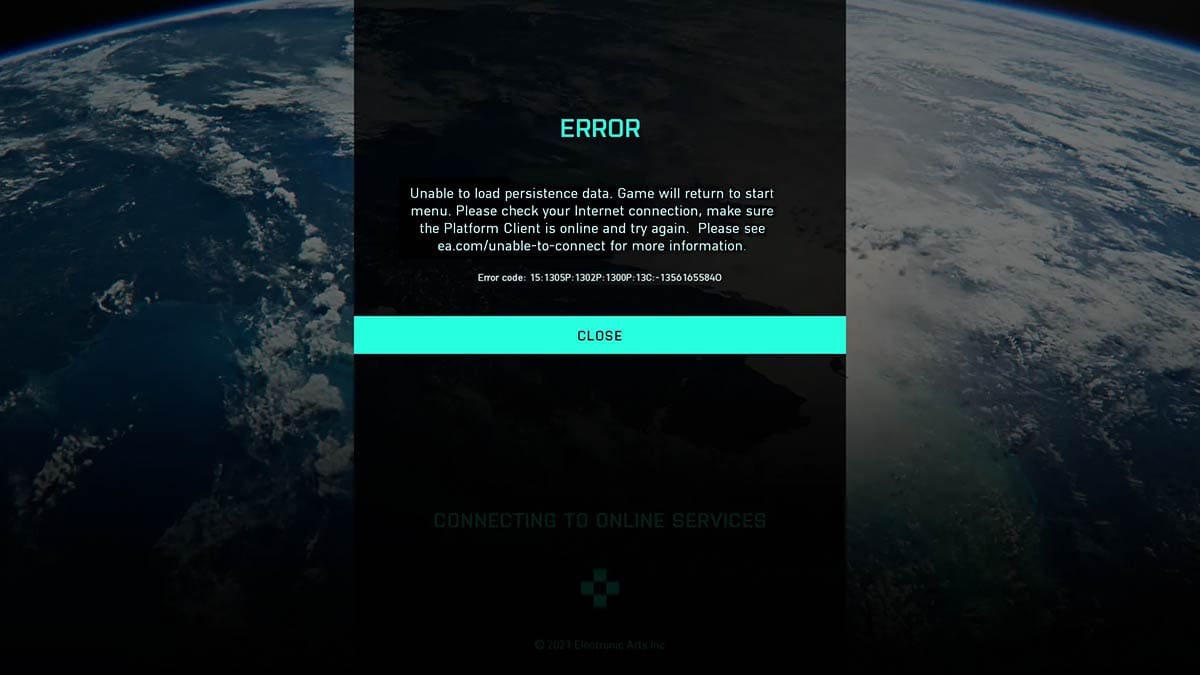
Battlefield 6 players may find themselves locked out of the beta or even the full game if Secure Boot isn’t enabled. This Windows 10 and 11 security feature ensures your PC only loads trusted software during startup. One said software is EA’s kernel-level Javelin Anticheat tool. Since Battlefield 6 relies on this feature to detect and combat cheaters, you’ll need to enable Secure Boot before you can jump into the game. Here’s everything you need to know about it.
Requirements Before Enabling Secure Boot

First of all, make sure that your PC’s have UEFI BIOS and not legacy BIOS as Secure Boot only works on the former. Look for BIOS Mode in the System Information application’s list.
Then your Windows OS installation drive must be formatted with the newer GPT format, not MBR. Check it in Disk Management > right-click your main storage or the one with OS installed > select Properties. If it says MBR, you’ll need to convert it using Microsoft’s official MBR2GPT tool. However, follow a guide or ask a pro — this can pose a risk to your drive if done wrong!
Last but not least, TPM 2.0 should be enabled in the BIOS. Most PCs built after 2016 should already have it. You can see if it’s enabled or not by going to the BIOS menu and looking for TPM, Intel PTT, or AMD fTPM option under the “Security” tab.
How to Enter BIOS Setup and Enable Secure Boot for Battlefield 6
Most PCs let you access the BIOS menu by pressing a key immediately after powering on. The key varies by manufacturer; some ask for Delete or F2, some use Escape.
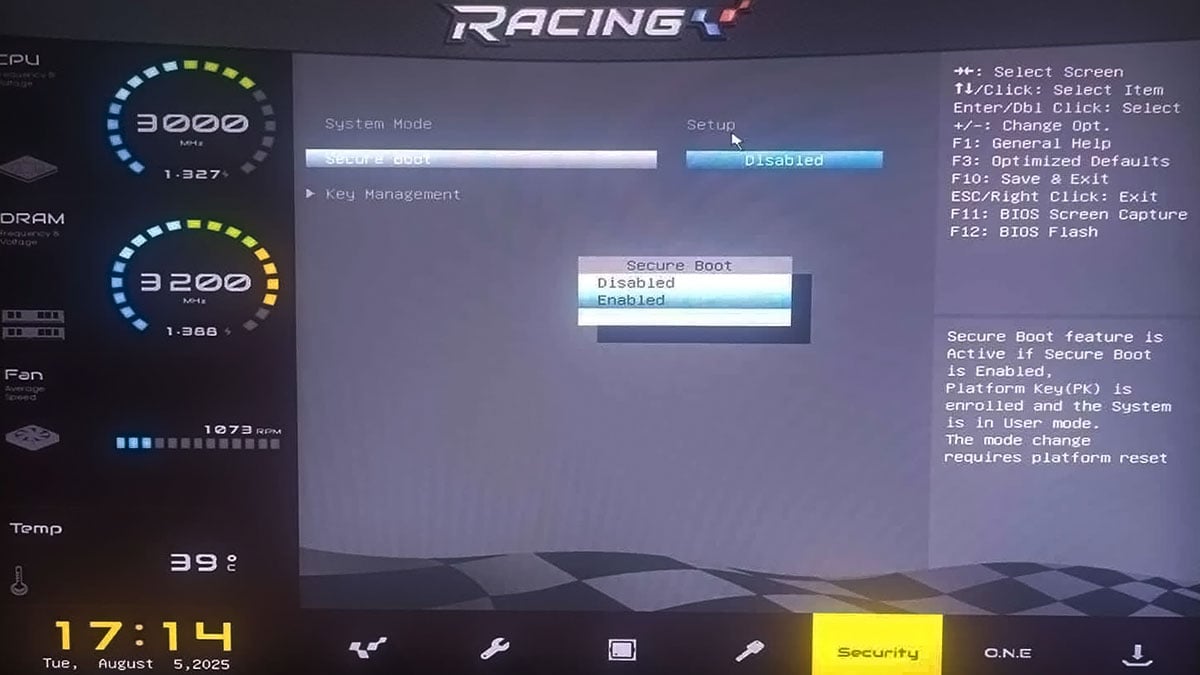
Do keep in mind that BIOS menus can look very different depending on your motherboard brand, such as ASUS, MSI, Gigabyte, etcetera. But basically, you just need to find the Secure Boot option in BIOS. In this case, we’ll go through BIOSTAR’s menu as an example, as I’m using a BIOSTAR B350GTN motherboard:

- Restart your PC.
- Tap the Delete key as soon as it shows the boot screen.
- Usually, you have 5 seconds before Windows loads.
- Try pressing the key a bit harder if your screen doesn’t instantly jump into the BIOS menu.
- Once in BIOS, navigate to the “Security” tab using the arrow keys.
- Then select “Secure Boot” and press Enter.
- Set “Secure Boot” to “Enabled” with the Enter key.
- Then you need to restore the Secure Boot Factory Keys in the same menu.
- Press “Yes.”
- Press “No” in the next window.
- Press F10 to save and exit. Your computer will restart.
For other motherboards, you might also need to select the Custom option and reset settings first. Afterward, go back into BIOS, enable Secure Boot, and save and exit the menu.
Always check your parts manufacturer’s official guide if the steps don’t match your screen. EA has also provided links for various brands over on go.ea/secureboot.
Confirm Secure Boot is Enabled for Battlefield 6
- Boot back into Windows.
- Press the Windows key or click the Start Menu icon.
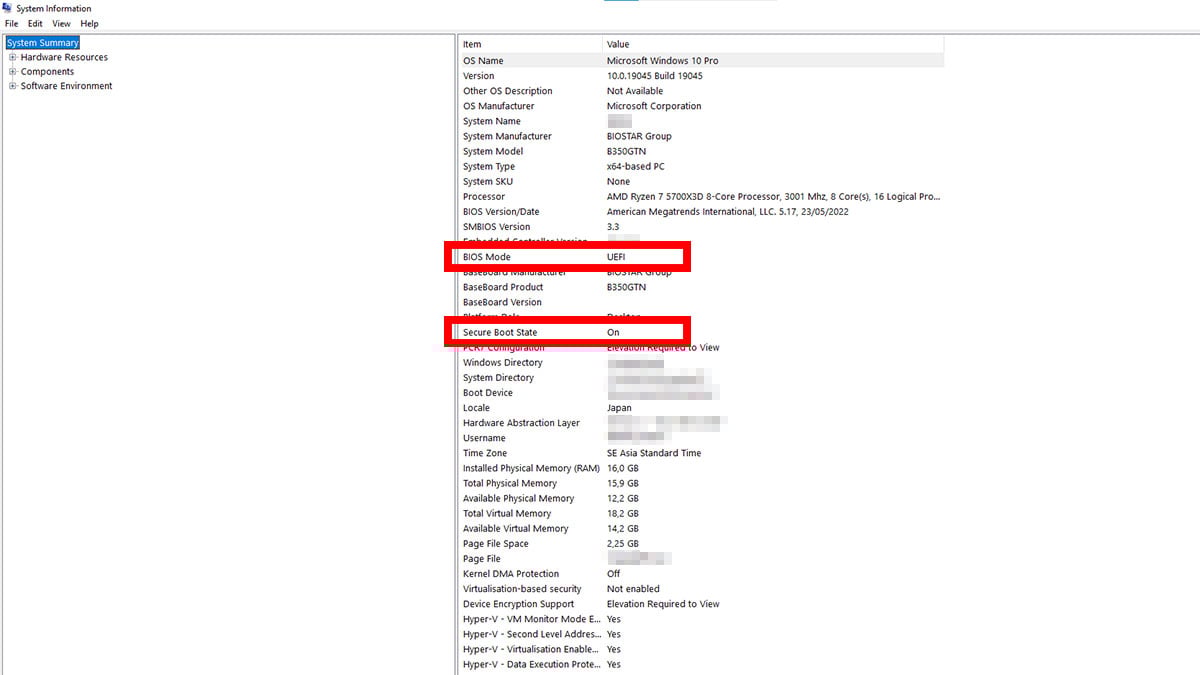
- Type “msinfo32” or “System Information” without quotes and press “Enter.”
- In the System Information window, click System Summary.
- Look for:
- BIOS Mode: Should say “UEFI.”
- Secure Boot State: Should say “On” if enabled.
If it says “Unsupported,” unfortunately, that means your motherboard doesn’t support Secure Boot. If BIOS Mode says Legacy, you’ll need to convert your OS storage to GPT before enabling Secure Boot.
If it’s on, you’re good to go. The Battlefield 6 open beta or the full game should now run smoothly without Secure Boot errors.


